In this post, we’ll walk through the process of creating a non-root user who can perform administrative tasks using sudo.
Create a New User
You can create a new user with the adduser command. Let’s say you want to create a user named johndoe:
adduser johndoe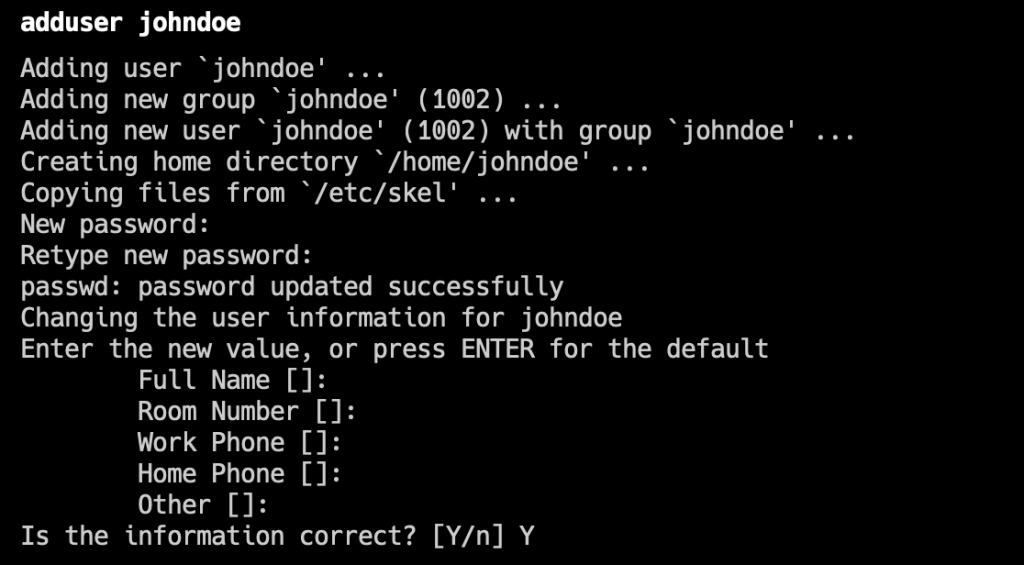
You will be prompted to enter and confirm a password for the new user. Additionally, you will be asked to fill in some extra information about the user. Feel free to fill this out or leave it blank if you prefer.
Add the User to the Sudo Group
After creating the user, the next step is to grant them sudo privileges. In Ubuntu, users who are members of the sudo group are allowed to use the sudo command.
usermod -aG sudo johndoeThis command modifies the user johndoe by adding them to the group sudo.
Test Sudo Access
To ensure that your new user has sudo privileges, switch to the new user account:
su - johndoeNow, try running a command that requires superuser privileges:
sudo apt updateYou should be prompted to enter the password of johndoe. After entering it, if the command executes successfully without errors, then congratulations! Your new user now has sudo access.
If you see the error message “johndoe is not in the sudoers file. This incident will be reported,” it indicates that the user johndoe has not been added to the sudo group. Make sure that the command to include this user in the sudo group was properly executed.
Wrapping Up
Adding a non-root user with sudo privileges is one way to secure your Ubuntu server. It limits the use of the root account, which can help prevent accidental damage and security breaches. Remember, regular audits of user privileges and adherence to the principle of least privilege can help maintain your system’s security.